Create the Order Confirmation
Creating an Order for a worker is quick and easy—it takes less than a minute once a Template is set up! Check out the video or training materials linked below for step-by-step guidance. If you haven't set up your templates, CLICK HERE to complete this step.
Quick Tip: You can create Order Confirmations for multiple workers at the same time if the details (like start date and billing info) are the same. The video below provide a step-by-step walkthrough.
Step 1
After logging into WorkRecords at www.workrecords.com, navigate to Orders on the blue menu bar and choose Create Orders - Add Workers. |  |
Step 2
Click on the correct selling location from the list displayed in your account.
Note: It is very important to choose the correct selling location, because different selling locations may contain different rules about sales tax, overtime factors, week ending dates, and other items.
|  |
Step 3
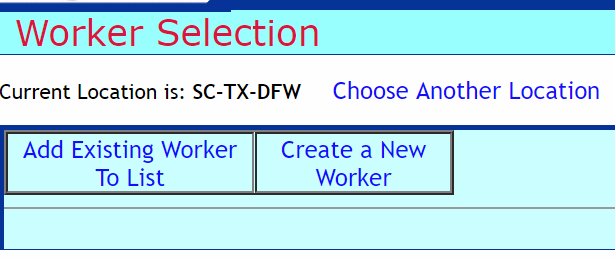
Once you select the location, you will have two options from which to choose.
- Add Existing Worker to List (allows you to find previously entered workers)
- Create a New Worker (allows you to add a new worker with a first name, last name, and SSN into the database)
|  |
Step 4a - Add Existing Worker to List
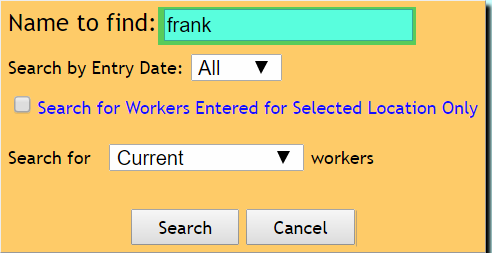
- In the Name to Find field, type in the most unique portion of the worker's name.
- Click Search.
- You will then see a list of workers with this name. Click the check box next to the worker that you need.
If you do not find the worker, ensure you have entered the name/partial name correctly. If the worker still does not appear, add the worker by following the instructions below in Step 4b.
Note: You can see on this screen if a worker already has an active Order at the property and confirm the bill rate on the existing Order. Notice on the right that Jones, Frank has an active Order at Worldwide Hotel, but Adjepong, Frank does not have any active Orders listed.
- Click the Add Checked Workers to List button to add this worker to your staging list.
Note: You can continue searching for additional workers and adding them to your staging list as well.
Step 4b - Create a New Worker
If you searched for the worker already and didn't find them, you will need to add a new workerworkers to WorkRecords.
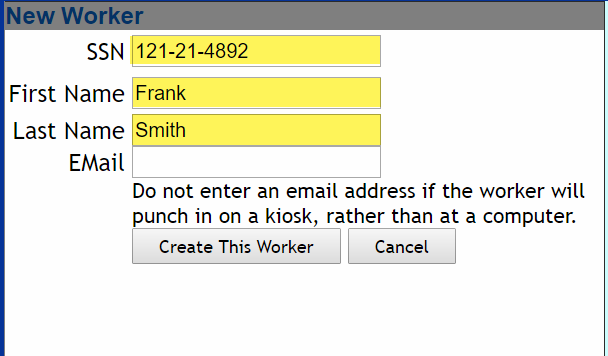
- Enter the worker’s SSN
- Enter the worker's first name
- Enter the worker's last name
- IMPORTANT: do not enter an email address for the worker.
- Click Create This Worker
- The new worker has now been added into WorkRecords and is placed in your staging list.
|  
 |
Step 5
Now you will proceed with creating the Order(s) for the worker(s).
Note: You can create Orders for multiple workers at the same time if the new Orders will have these same details: job title, bill/pay rates, start date, property, and Buyer Primary Contact. Otherwise, you can create Orders for each worker individually.
- Check the checkboxes for the workers in your staging list that meet the same criteria. If all of them meet this criteria, you can simply check the Check All box at the top to check the boxes for all of the workers.
- Click the Start Order w/the checked Workers button.
Note: You may also use this screen to delete workers from your staging list.
|  |
Step 6
You will now see a list of your customers for whom you have Templates created.
- Click the + sign next to a property name to see the Templates
- Click on the appropriate Template's name.
Note: If you do not see a property name listed, that means you have not yet created a Template for that property. You will want to create a Template for the property.
Note: If you see Templates under a property, but do not have a clickable hyperlink for a specific Template, that means the Template name was left blank when the Template was created. Delete the Template (click the Delete link), then create a new Template ensuring that the new one is saved with a name.
|   |
Step 7
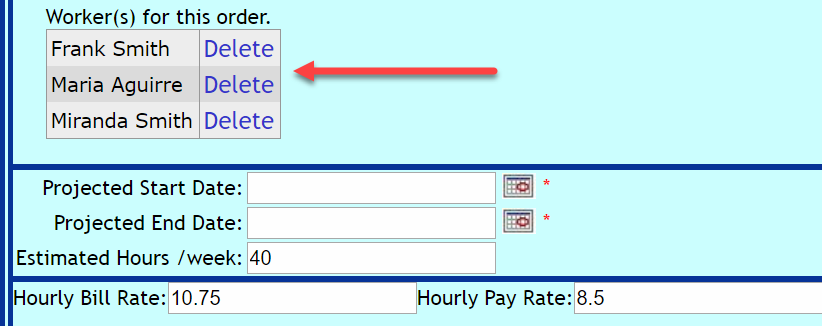
Verify the workers for whom you are creating Orders. You will see their names near the top.
Note: If you accidentally added a worker by mistake, simply click the Delete link to remove them from the list. Then, proceed with creating Orders for the rest of the workers.
|  |
Step 8
- Enter the Projected Start Date for the Order. The start date must be on or before the day the worker is expected to check-in.
Note: A Start Date cannot be changed on an Order after you create it. If you make a mistake and the worker's start date should have been earlier, then a new Order will need to be created for the worker.
- Enter the Projected End Date. This date is a placeholder and indicates the expected length of the assignment.
Note: The date entered for the Projected End Date does not cause the Order to terminate once it reaches that date. It is simply a placeholder designed to communicate how long the assignment is expected to last.
Note: For an undetermined end date on long-term assignments, many people use contract term dates or year-end dates.
|  |
Step 9
Much of the information will already be populated, as it all carries over from what was entered on the Template. Verify all of the following items listed below. Note: You can type over anything entered in a white box and enter new text.
- Estimated Hours/week
- Hourly Bill Rate
- Hourly Pay Rate
- Shift Differential Amounts for shift 2, shift 3, etc.
This is optional if the worker bill/pay for shift worker is different. Note: This is the additional amount to bill/pay on top of the base Hourly Bill Rate or base Hourly Pay Rate. - Bill Factor 1
- Verify the Additional Billing Items listed are the ones that you need on this Order. Click the Select drop down box in the green shaded area to see other AddOns available for this account and add them if necessary.
Note: The MISC AddOn should always be included in every Order that is created. - Bill Amount and Pay Amount for Additional Billing Items
- Customer PO/Req #
- Your Sales Order #
- Sales Tax
- Notes
Note: Notes added to the Order will be visible to the worker at the Kiosk if they have more than 1 active Order for that property. It can help them to choose the correct Order in which to check-in. - Buyer Primary Contact
Note: The email address you enter for the Buyer Primary Contact must be an email address of a WorkRecords user account for the Labor Buyer. - Supplier Primary Contact
- Supplier's Alternate Contact (optional)
Click the Next Step button at the bottom once you are ready to move forward.
|  |
Step 10
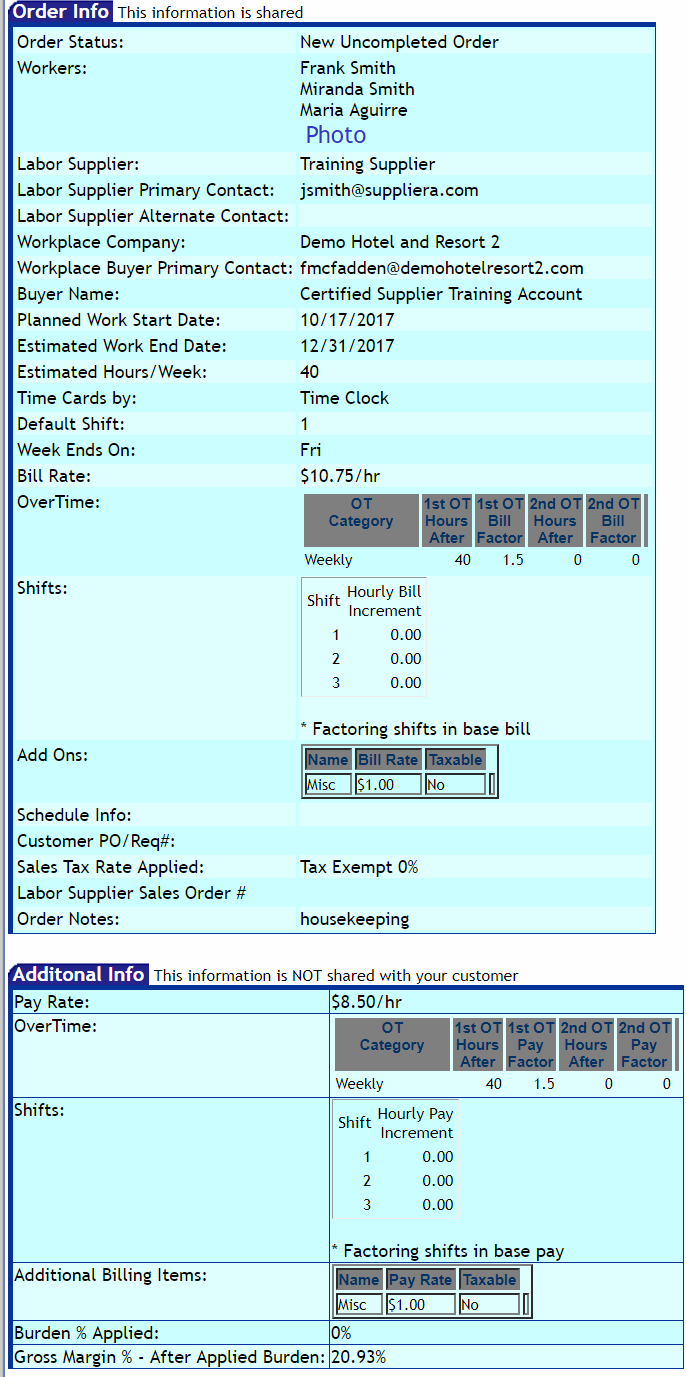
Review the details for the Order Confirmation(s) that you are creating. This information is based on what was entered on the previous screen. Please review carefully. If for some reason it is not accurate, you can always use the Previous Step button to change the information as needed.
The Order Info section at the top will be displayed to your Labor Buyer.
The Additional Info section is only visible to Labor Suppliers.
Note: Gross margin is calculated based on bill rate, pay rate, and burden %.
|  |
Step 11
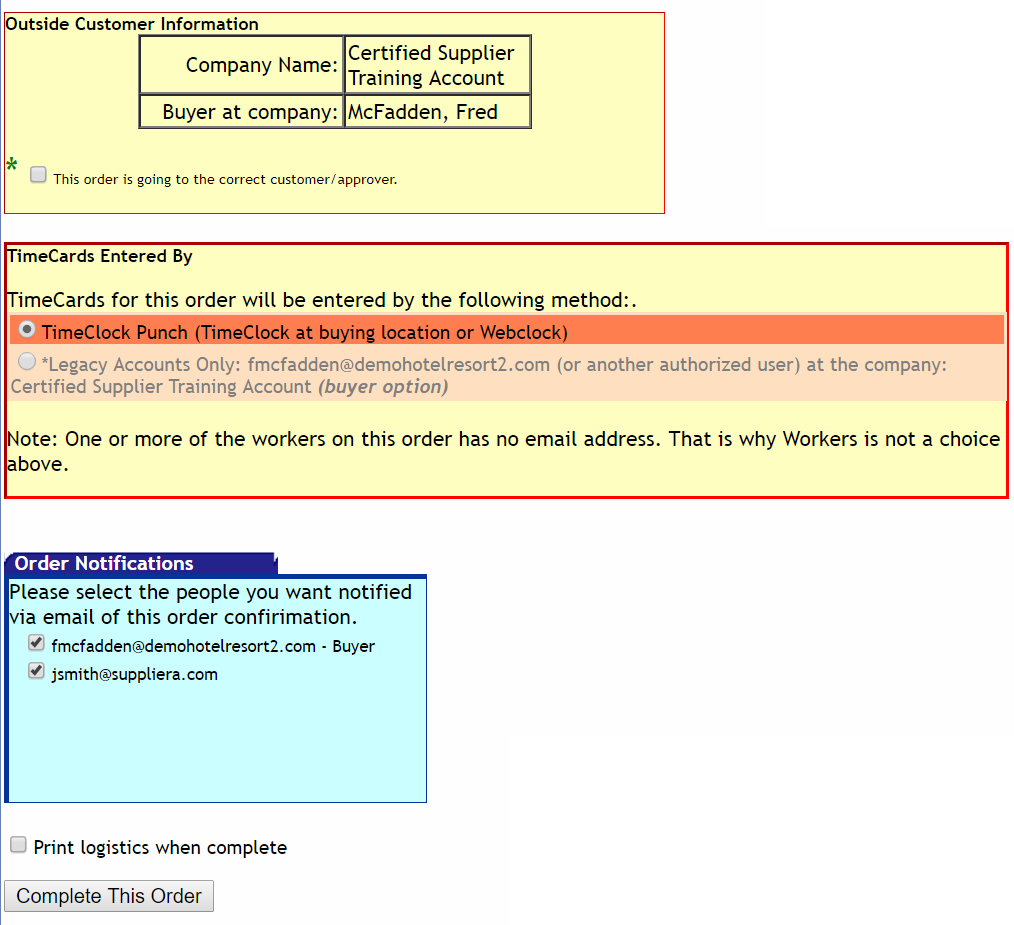
Once you are satisfied with your order information, you must complete the following:
- Outside Customer Information: Check the check box to confirm the company name and the individual to which the order will be sent.
- TimeCards Entered By: For clients who started using WorkRecords after 2009, this selection should always be TimeClock Punch. The workers will only be able to check in and out at the property if TimeClock Punch is selected.
Note: If TimeClock Punch is not showing as the option, then you most likely are entering an email address for your Buyer Primary Contact that is not set up with a WorkRecords user account. Please contact support@workrecords.com to verify the email address before proceeding.
- Order Notifications: Check the box(es) next to the people to whom you want confirmation of new Orders to be sent. It is recommended to always copy your customer’s email address.
- Print Start Logistics: Unless you have been instructed otherwise, leave this box unchecked.
- Click the Complete This Order button.
|  |
NEXT STEP: Communicate the GoLive Date to Your Workers


